Monday, September 29, 2014

Letter T Bento

Back to alphabentos ... Today is Letter T.

Here are the ingredients that I included in my Letter T Bento. Terra Taro chips. Foster Farms sliced deli Turkey. Tangelo sections. Tortellini. Toscana cheese. Tootsie rolls.


First, I prepped my food - cooking the tortellini, and separating out the Taro chips from the rest of the veggie chips. (Don't worry - we ate the remaining veggie chips for snack.)


I placed the tortellini into the Easy Lunchbox.


The Taro chips are placed into a separate container of the lunchbox, in order to keep the freshness. (Actually, here's a hint: I didn't place the chips into the lunchbox until morning. This action also keeps the veggie chips fresher.)


Small chunks of Toscana cheese (one of my favorites) fill up a silicone baking cup.


Thin slices of deli turkey are rolled up and secured with food picks.


Once the turkey roll-ups are placed in the other silicone cup, the juicy tangelo slices fill another compartment. A mini tootsie roll completes the Letter T Bento.


Begin thinking of the T ingredients that you could pull together for a Letter T Lunch, and check back on Thursday for a thorough list of healthy T foods.

Thursday, September 25, 2014

Ultrasound Reveal and DIY Pics of "Baby Bee" Bento

On Monday, I showed you the lunch I made for the kiddos on Ultrasound Day. They were convinced that it was a girl. And they were right ... it's a GIRL!

We surprised them with pink donuts from TopPot (a local donut shop). "Pink" because that is how we told them "it's a girl!". Donuts because it was a celebration, and donuts are a very rare treat.


Here is how I made this "guess-the-gender" lunch.


I began with the following ingredients:
Hard-boiled eggs (not pictured)
"Blue for a boy" ingredients - blueberries and blue corn chips (Garden of Eatin' chips are DELICIOUS!)
"Pink for a girl" ingredients - red radishes and red bell peppers. (Naturally pink foods are rather difficult to come by, so I substituted red.)


After removing the shells, I rolled the peeled, hard-boiled eggs in yellow food-coloring, and then pat them dry with a paper towel.


Here's the dyed, hard-boiled eggs.


Once the eggs were patted dry, I added candy eyeballs and positioned a strip of nori (dried seaweed) as a bumblebee stripe.


One more nori stripe and sliced almonds as the wings, and the edible bumblebee is complete.


Moving on to packing the lunch: I began by placing several silicone baking cups in the lunch container as placeholders. I added blueberries to one blue silicone baking cup.


Red pepper strips filled in one side of the container.


Radishes fill in the space opposite the red peppers. And blue corn chips (so yummy!) get added to the other silicone baking cup.


Lastly, I placed the bumblebee egg in the small silicone cup in the center.
Now the "What Will Baby 'Bee'?" lunch is complete.


Monday, September 22, 2014

What Will Baby Bee???

Last Friday, my husband joined me on a trek downtown for my 20-week ultrasound. The kids were SO bummed that they couldn't skip school to come along. (They didn't know that was NOT even an option.)

Both kids were certain that this baby was a girl, but I told them that they'd just have to wait and see - it's a 50-50 chance. I packed them a cute lunch and a note in order to keep their anticipation peaked.


A play on words ... What Will Baby "Bee"?
Obviously, the blueberries and blue corn chips stand for a boy. The red bell peppers and radishes represent "pink" for a girl. The bumblebee is made from a yellow-dyed egg with nori stripes. Come back on Thursday to learn how to make it!

But before you go, give me your best guess - boy or girl? I'll post the answer on Thursday!

Thursday, September 18, 2014

Zoodles and Sauce

It's zucchini season! If you're not overwhelmed by zucchini from your garden, then you're probably getting gifted some. But even if neither is the case for you, it's pretty cheap at the store right now. What to do with all of this wonderful, green veggie goodness?

Here's a favorite of mine that I discovered a few months ago. Zoodles - zucchini cut into noodle-like strands, topped with sauce. Oh yum! Here's how ...

First, a list of ingredients: zucchini, olive oil, sauce. Pretty uncomplicated.


While the sauce is heating on the stove, cut off the ends of the zucchini, and then cut it into 3 equal pieces.


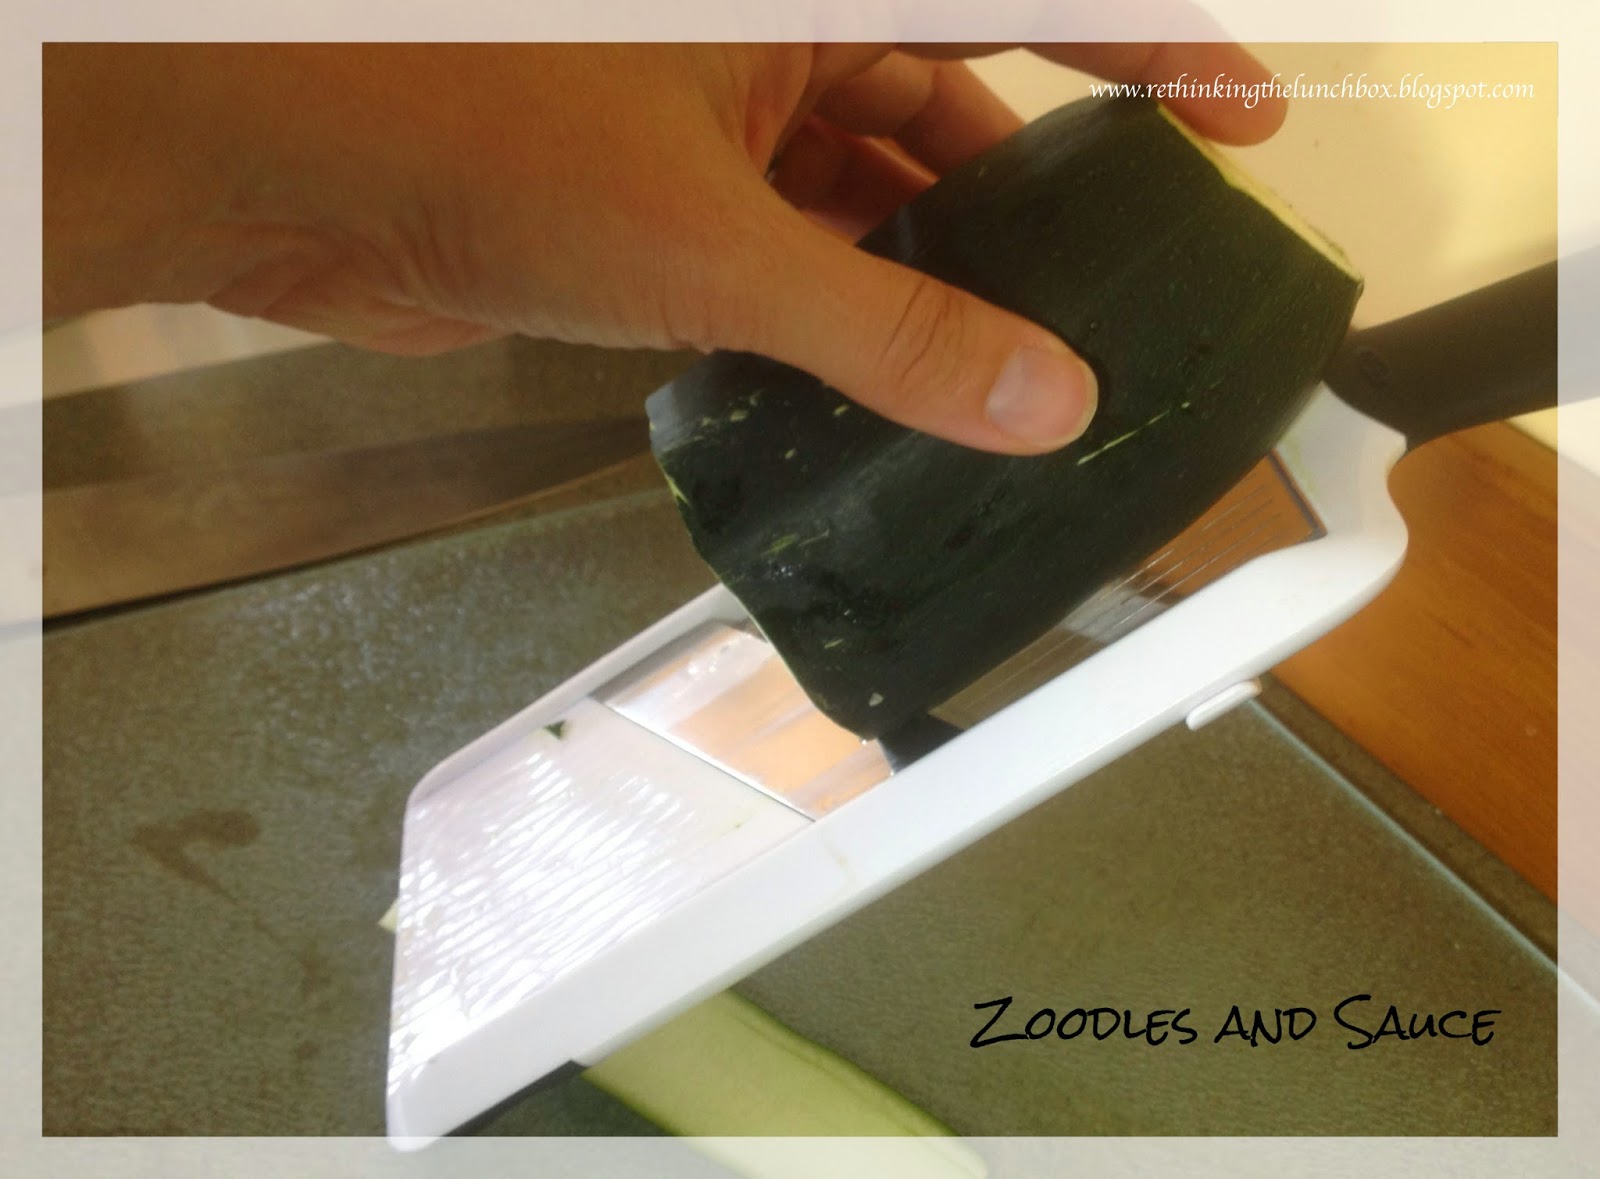
 Using a mandolin on the thickest setting, run the zucchini over the blade several times, until ...


... you get to the seeds. Then rotate the zucchini in your hand, and repeat slicing all on sides.


Stack the slices of zucchini. Slice into thin sticks. (Sorry for no picture on slicing; somehow, I deleted it.)


In a skillet, warm a little bit of olive oil over medium heat, and add the zucchini sticks. Saute for 3-4 minutes, until all of the zucchini is cooked.


Place your freshly made zoodles in a bowl.


Top with warmed sauce.


And enjoy your delicious, healthy lunch!


I mean, it's SO good that my self-proclaimed picky-eater father-in-love says, "That's pretty good!" Whoa! Give it a try!

Monday, September 15, 2014

Spaghetti Squash & Pesto - a Healthy Lunch for Adults

For the most part, I've focused on healthy lunches for kids. But what about the rest of us? We need healthy lunches too! Plus, it'd be helpful if the lunches were premade, appealing, portable, appetizing, ready-to-go ... I could go on. Here's one of my current favs!
Spaghetti Squash with a dollop of pesto.
Easy, nutritious, affordable and definitely packable.


To make this delicious lunch entree:
(1) you'll need a spaghetti squash (obviously), a cutting board, a sharp knife, a spoon and fork (not pictured) and a baking dish.
(2) Cut the squash in half lengthwise, and scrape out the seeds.
(3) Next place the squash cut-side-down in the baking dish, add a little water, and cover with plastic wrap.
(4) Microwave about 10-12 minutes, depending on the size of your squash.


Once the squash is cooked, carefully remove the plastic wrap, and lift out the squash half using an oven mitt. It's gonna be HOT!


Here comes the fun part: with a fork, scrape the flesh of the squash. It will naturally shred into spaghetti-like strands!


Throw the spaghetti squash strands into a bowl, and top with a bit of butter, cheese or sauce. I used a few dollops of homemade pesto. Delicious! And so good for you!


If you're packing your lunch to go, just put it into a Rubbermaid-type container, and reheat once lunchtime rolls around. I'll bet you'll be the envy of the lunchroom!


Thursday, September 11, 2014

Product Review of TJ's August Fearless Flyer

On Monday, I made a nutritious, packed lunch using only 5 ingredients, all of which were from Trader Joe's August Fearless Flyer. And I promised kid-approved reviews of that lunch and its components. So here they are ...


(1) For the dairy component: TJ's Organic Lowfat Yogurt Squishers were a hit! LoveBug described them as "yummy", and SuperBoy cheerfully said that they were "great".

(2) The protein part: TJ's Gluten-Free Chicken Nuggets. You already know that I LOVED them, and my son agreed that they were "great!" My daughter said that the nuggies weren't her favorite, and I had to agree that they did taste much better hot and fresh from the oven. (Guess what I'm gonna eat for lunch today ... the last serving of nuggets!)

(3) Grains: TJ's Gluten-Free Blueberry Muffin. The kids raved over these, wanting another one for snack that afternoon! LoveBug described them as "moist, blueberry-filled, with a tiny taste of maple". That should give some hope for those that are GF; delicious muffin options await for you at Trader Joe's!

(4) Fruit: LoveBug kept telling me about the "granola bar in my lunch", by which she meant the TJ's two-ingredient Fruit Bar. I tried the Apple Mango, giving LoveBug and SuperBoy the Apple Strawberry and Apple Banana respectively. They were tasty and chockfull of fruit bits - two types of fruit, no preservatives, no yucky stuff. We can't wait to try the Apple Coconut Fruit Bar.

(5) Veggies - Lastly, the Inner Peas. I really wasn't sure what my kids would think of these. I taste-tested these along with my mom-in-love (who was visiting), and we adults agreed that they were "crunchy and salty at first, but left a weird aftertaste". On the other hand, My kids. Could. Not. Get. Enough. They LOVED those crunchy, baked pea snacks! Fortunately, there was enough leftover to pack another serving for the next day's lunches. Woohoo for pure veggies getting into my willing kids. I couldn't be happier!

Monday, September 8, 2014

Trader Joe's Lunchable

Today's lunch is brought to you by Trader Joe's and their August Fearless Flyer. We happen to be lucky enough to have a Trader Joe's down the road from us, but if you don't have one of these awesome stores, you can easily substitute foods from your local store.

The point of my Trader Joe's lunchables is two-fold: (1) a healthy lunch that is (2) easy to make. Therefore, if you grab an item from each food group (dairy, grains, protein, fruit, veggies), you can quickly and easily make a portable, healthy lunch. No matter what grocery stores are around you.

Plus, on Thursday, I will give you the kids' reviews of these products.


Today's lunch consists of:
(1) Dairy: TJ's Organic Lowfat Yogurt Squishers - these yogurt tubes come in a box of 8 for $3.19, which is about $0.40/tube. You have a choice of 8 Strawberry yogurts in a box, or a combo or Cherry and Berry yogurts, 4 each in a box.

(2) Grain: Gluten-Free Blueberry Muffins - my family is not gluten-free, but I know of several families that are GF. I figured we would give these blueberry-filled bakery treats a try, and on Thursday, we'll let you know the verdict. $3.99 for 4 muffins, making them each a dollar.

(3) Protein: Gluten Free Chicken Nuggets - Omg. I know that I said I was gonna give you our reviews on Thursday, but wow. After I baked these for the kiddos' lunches, I tried one. Wow. These might be the best store-bought, oven-baked chicken nuggets that I have ever eaten. $4.99/16 nuggets. 1 serving is 4 nuggets, making a serving $1.25 each. Not exactly cheap, but for GF and non-GF eaters alike, these nuggies (as my kids used to call them) are perfect.

(4) Fruit: Fruit Bars - these are relatively new to Trader Joe's. The thing I love most about this new product? There are only 2 ingredients, and both are fruit. No preservatives, no additives, nada. Four different flavors - Apple Banana, Apple Coconut, Apple Mango and Apple Strawberry. $0.99 each for pure fruit goodness.

(5) Veggies: Inner Peas - Baked green pea snackies with a touch of salt. On Thursday, I'll let you know what my kids thought of them. $1.49 for about 3 servings, making it a doable $0.50/serving for veggies!


To assemble, I baked the chicken nuggets ... and taste-tested them of course! While the nuggets cooled a bit, I cut the blueberry muffin to fit into the lunch container. Inner Peas go in one section, and chicken nuggets (so yummy!) plop into the other small section. Add a lid, and pack the Yogurt Squisher and Fruit Bar on the side. And presto - LUNCH!

For less than $4.25. More expensive than a school lunch, BUT much more healthy! And super easy to make.

By the way, if you are packing the lunches the night before like I do, I would wait to add the Inner Peas until morning. The refrigerator can add moisture to the baked pea snacks, making it less than desirable. Other than that, you're good to go!


Wednesday, September 3, 2014

Back to School Bento

The day has finally arrived for our household ... I am sitting in my living room, writing this blog in peace and quiet ... the first day of school has arrived! And yes, of course, I sent my kiddos to school with an awesome lunch. This is a revisit to the one I made last year, but this time, I included a tutorial.


You might be thinking, "Great! But my kid started school a few days or weeks ago. I'm SO late to this cool lunch thing." My answer to that: Nope, you're not late at all. So you didn't present this lunch on the very first day of school. That's okay. Nothing is stopping you from surprising them with a funky lunch tomorrow or next week. Just think how surprised they would be! So follow along with my DIY lunch tutorial, get inspired and make a school-themed lunch soon.

 Here's what I started with:
A bag of Bugles.
White sandwich bread - we don't usually eat white sandwich bread, but in this case, it's necessary for the lunch.
Starbursts - must include at least 1 pink type in the bag.
Deli meat - or pbj.
An apple - for the stereotypical "apple for the teacher".
Veggies - not pictured.
Two-tone string cheese - technically, you just need the orange side, but I couldn't find any plain, rounded orange cheese sticks.


First to make the notebook paper sandwiches:
(1) & (2) Measure the size of your sandwich container. You don't want to make the sandwich and THEN have to cut it to fit.
(3) Cut the bread to size.
(4) Make sure the bread slice does indeed fit into said container, and that small fingers can reach in to grab it at lunchtime.


Next, creating the look of the notebook paper:
(1) I had to pull out a piece of notebook paper, to remember the direction of the blue lines vs. the direction of the red lines. :)
(2) Use a blue Wilton food-safe color markers (available at JoAnn's and Michaels, or online) to draw horizontal lines on the sandwich bread.
(3) Use the red marker to draw one red line down the left-hand side of the "notebook paper".
(4) I double-stacked two sandwiches in my kids' containers, so I made two "notebook paper" per child. 
(5) Not listed: fill the sandwiches with the desired filling. Today, I used ham and spinach.


For the pencil:
Lay out the cheese sticks. Pick the ones that are completely orange on one side. Since pencils are usually orange or dark yellow, we want the cheese stick to mimic that look.


To make the pencil eraser:
(1) From the Starburst bag, pick the lightest pink or red candies. I choose Watermelon and Strawberry.
(2) Unwrap the candy, and pull out a paring knife or apple corer.
(3) Center the apple corer over the Starburst, and push down through the candy. 
(4) Roll the Starburst circle on the cutting board to smooth out uneven edges.


To create the pencil:
(1) Gently push a toothpick into one one end of the cheese stick.
(2) Add Starburst eraser. I found it worked best to twist the Starburst onto the toothpick, rather than pushing it on.
(3) Using a paring knife, carve away a bit of the other end of the cheese stick, and add a toothpick.
(4) Gently place a Bugle onto the toothpick.


Using the black, Wilton food-safe marker, color the tip of the Bugle to resemble a sharpened pencil.


To assemble, simply place the notebook paper sandwiches into a lunchbox container, and place the cheese stick pencil on top. Add fruits and veggies of your choice to another container.


If you are a homeschooling parent or have toddlers and preschoolers at home, this lunch is easily adaptable to plate at the dining room table.


Happy lunching, and happy 1st day of school!